Showing posts with label shutterbug. Show all posts

Sunday, June 12, 2011

Shutterbug Sunday: The Rule of Thirds


Have you ever heard of “The Rule of Thirds?” It is quite possibly one of the most essential parts of photographic composition, and I must admit I was clueless about it when a friend first mentioned it to me. Rule of Thirds? Composition? I remember thinking that photography was just about aiming and clicking that shutter button at something I thought to be a worthy subject. But, no! As I have come to learn, there is more to a great photograph than just getting lucky.


The easiest way to explain things is that an image is made up of nine equal parts (refer to the above example). The "thought" or "rule of thumb" is that when taking a photograph, the point of focus should be placed along these lines or match up to one of the intersections. When taking a picture, most people probably never think about this concept.  It's something I never used to think about.  I just took pictures and aimed my focal points where my “eye” was directing me.  I never thought that what I saw as a good shot, was actually falling in line with the rule of thirds. I always feel visual examples are the most helpful. Bellow are some pictures with the graph so you can see how the focal points in each image line up. If you've never heard of this concept, keep it in mind the next time you are out shooting and experiment a little.  I would love to hear feedback on the effect it has on your images when applying it to your photography!


Happy Sunday!

Sunday, June 5, 2011

Shutterbug Sunday: Blurred Edges


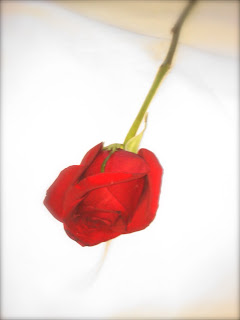
Whenever I take a photo that doesn't come out completely clear, I try to salvage it.  Changing the coloring to black and white will cover some imperfections.  I've also discovered that blurring the edges of a photo can make the imperfections seem lovely.

Not long ago, I showed you how to give your pictures a hazy feel by putting pantyhose over your lens.  If you prefer to have a solid focal point in the center of your picture, with a hint of haze around the edges, you can accomplish the effect with simple editing.  If you don't know your editing options, you're wasting time!!

I know you all have different photo programs.  If you use iPhoto on a Mac, follow these steps:  Click on the picture, press "edit", choose "effects", and click on "edge blur" several times...until you reach the desired haze.

For some pictures, the haze is obviously intentional.  For others, it can add a subtle mood to the picture.  I wanted this rose to be clear, but soft, to reflect a sad occasion.  Blurring the edges offered me that effect.  Don't pay a photographer to do this for you.  It is easy if you just spend a little time getting to know your editing software.

Sunday, May 29, 2011

Shutterbug Sunday: My Top 10


When I was getting started with photography, I took a basic studio class at the Community Darkrooms in Syracuse. The instructor of the course gave us a piece of advice that I will never forget, for multiple reasons. He told our class that the best thing we can do, is follow other photographers' work. At first, I was confused. The word copycat kept coming to mind, and that was the last thing I wanted for myself. In spite of thinking it was a weird idea, I started following other photographers' work.  Now, as I look back, that little tidbit of advice could quite possibly the best I have ever received!  Following the work of others has provided me with many learning opportunities, resources, and support throughout my journey.  Now, I want to share my 10 favorite photogs with you!

1. Barb Uil of Jinky Art: She is absolutely my favorite photographer ever! The creativity this woman possesses is mind blowing and her photographs constantly leave me speechless!
2. Kristen of K. Holly Photography: Her images are breathtaking, with a soft dream like quality that I love. She is sweet as can be and I would get married all over again, just so I could have her photograph my wedding. Ask her anything!
3. Jasmine Star: This lady is perhaps the best go-to photog and most famous of the bunch.  Want to know something? Ask her for advice, I dare you!
4.Kelsey Anderson: I love her unique style and use of natural light.  She is another great person to answer your questions.
5.Annie from Paint the Moon Photography: Color. Color. Color. Annie is not afraid to use it and is the creator of some of the best photoshop actions and textures I have found. She also has a great support system for those of us who aren't very photoshop savvy!
6. Jose Villa: Believe it or not, he still does the majority of his shooting with film. Yes film! His images are beyond gorgeous.
7. Baby as Art: Maybe a more suitable name for them would be "The baby photographer gurus". Check their work to see what I mean.
8. Keri Meyers: Another newborn photographer that is able to get those little babies into perfect positions.
9. Skye Hardwick of Work of Heart Photography: I love the expressiveness in her photos.
10. Lupen Grainne: She has some of the prettiest nature and landscape imagery ever!

I processed this pic with textures from paint the moon.

Enjoy your Sunday!

Sunday, May 22, 2011

Shutterbug Sunday: Grad Series


Oh, the wonders of Mod Podge.  Really, you can create any theme you want on top of anything that is wooden, metal, paper, etc.  I just love that stuff.  Since we are in the midst of graduation season, I'm using this Shutterbug Sunday to focus on a fun way to display your lovely pictures.

Here's what you need:

1-Inexpensive wooden frame.
2-Mod Podge
3-Adhesive
4-foam brush
5-Paper Trimmer
6-Embellishments (optional)

Pick a theme paper for your frame.  Right now you can find a large selection single sheets in the scrapbooking sections of craft stores.  You could also rip a page out of an old text book, with a lesson on the student's main subject of interest.  If you have a notebook full of scribbles and notes written by the actual student, rip out one of those sheets.  I opted to create my own page of notes on acid-free scrapbooking paper.  I placed my paper over the frame and used a knife to cut the hole out.  Leave a little paper to spare and tuck into the frame when you mod-podge.

Dip your foam brush in the Mod Podge and cover the surface of the frame with a layer.  Add your paper and smooth it out.  Next, I doodled all over the paper.  If you scribble your own notes, be sure to let the ink dry completely or it will run.  I used a black, acid-free, non-bleeding, fine-tipped marker from the craft store.  When your paper is dry, add another layer of Mod Podge on top of the paper...smoothing out bubbles.  Make sure there are no finger prints or odd clumps on the surface because the way you spread the MP will be evident as it dries.

Once the Mod Podge dries, you can add embellishments, if you want to.  Anything that makes you think of school work would apply.  If math is the grad's major...maybe a ruler would work.  A good ole' pencil fits any subject.  Adhere the embellishments.

This would be a great gift for the graduate in your life or you can give the frame to a deserving teacher.  There wouldn't be any graduates without them.  Come back tomorrow for a bonus grad series post.  Class over!  Enjoy your homework.

Sunday, March 27, 2011

Shutterbug Sunday: Homemade Filter


This may just seem like it is not in focus...but the effect is intended to teach you a fun and free trick.  If you've watched Barbara Walters over the years, you may have noticed her lighting seems softer now.  There is a haze around her that smooths out blemishes and lines on the face.  If you want to add a fun and hazy effect to photos...you can grab a filter right out of your sock drawer.  Different shades of pantyhose offer different outcomes, some more subtle than others.  Just gently cover your lens with the fabric and take a photo.  I grabbed four shades of pantyhose to find out how they would each look on the same subject.  Here are the results.

NO FILTER:

NUDE:

OFF-WHITE:

NAVY:

BLACK:

Some of the results surprised me.  Of course...you want a spray of roses to be colorful.  But, the right set of circumstances may have you slipping your knee highs off your feet and onto your camera lens.  Try it out and let us know if you make any fun discoveries.

Monday, March 14, 2011

Baby Blessings

Crafty Life and Style would like to announce a baby blessing for our Shutterbug Sunday contributor, Mary Nichols.  Between her busy preparations and oh...delivering a baby, Mary still managed to get us her blog post over the weekend.  Mothers are fierce.  We're sure to see amazing photos of this bundle of joy as Mary tests her skills and teaches us what she learns along the way.  So, this is a crafty cause for celebration.  I mean, can you imagine what her scrapbooks will look like with this being a typical photo?  Congratulations Mary.  Your child is beautiful.

And if you'd like to see examples of Mary's work....just scroll down to the next blog!!

Sunday, February 13, 2011

Shutterbug Sunday: Framing the Shot


I wanted to share with you one of the very first pieces of advice I was ever given when taking pictures. My father and grandfather were both photography hobbyist, and the reason my love affair with photography began. My father first placed a professional camera in my hands at the age of 16. I remember holding the old piece of equipment, and taking in its leather smell. I was so excited to try it out, I think I went through an entire roll of film in about 20 minutes!

Tip: The closer you are to your focal point, the lower/wider you want your
 aperture setting to be. For example mine was set to f/2.2, this is how I was 
able to keep her face sharp, and the palm branches soft. You will also want
to make sure to toggle your  focus points in your lens when using wide apertures, 
 especially on people. The focus point in my lens was directly over her eyes.

Once teaching me a few technical things about its operation, my Dad gave me a great piece of advice that I have now applied to every aspect of photography. While we were out shooting for the first time I had practically tripped down a hill when trying to avoid some brush that was getting in the way of the shot I wanted. My Dad told me that instead of avoiding the brush, to use it. Frame the shot he said!  So I tried it. I outlined the shape of the base of the tree I was trying to photograph with the brush. After getting the photos back I flipped through them and one picture in particular caught my eye. Yup, you guessed it, the one where I had framed the tree with the brush. It had so much more visual interest than any of the other pictures I took. So, long story short? I started using that technique in nature photography and now I apply it to every aspect of photography I do. So the next time you’re out and about taking pictures try using some of nature’s natural elements and FRAME THE SHOT!  You might just love the results!

Sunday, January 30, 2011

Shutterbug Sunday: Night Flash

I know it automatically pops up everytime you press down on the button to take a night photo.  But you don't always HAVE to have your flash activated for every picture.  Learn how to turn it off.  Why?  Because even if it is late at night, particularly if it is getting dark...your flash may be doing you more harm than good.  Take these pictures as an example.  The one above shows the lovely burning coals.  The colors are vibrant and glow.  But, the one below is washed out by a bright flash from my camera.
The challenge with many cameras is that you have to be very still when the flash is off.  The smallest movement can cause streaking in the photo.  But, the difference is obvious.  Try a tripod.  At night, if you are taking a picture of something that provides it's own source of light, capture more color and turn that flash off.

Saturday, January 22, 2011

Meet Ashley Sisk

Some people are just destined for greatness. Ashley Sisk is one of those people who has a very bright future in the photography world. Ashley decided to pick up her camera after her October 2009 wedding. She always enjoyed taking pictures before, so she thought it would be a good hobby to nurture. In a very short year and a half she's started a blog,  rediscovered her creative spirit, enhanced her photography and editing skills and made some incredible friends along the way!

I'm a big fan of hers and I just love the creative pictures she takes. They POP off the page! Ashley is going to be our guest blogger for tomorrow's Shutterbug Sunday! Please come back tomorrow and show her some love!!!

Sunday, January 16, 2011

Shutterbug Sunday: The Perfect Prop

The balloons in this pic are from Wegmans. I always grab a bunch for my photo
 shoots where the babies are turning 1 to celebrate the big event!

Who’s ready to talk props? At the end of this post I would love to hear some feedback from some of you other prop enthused savvy individuals!

So for me, a good prop should have 2 key ingredients. The first? It needs to be cost effective. I go prop shopping with a limited budget so I like to find things that are inexpensive, yet photo worthy. The second? I need to be able to multi-task with it. In other words, I want the prop to work for more than just one photo shoot. If it doesn't, I feel it was a waste. When choosing a prop to use with babies for example, I like something that has enough room for them to sit comfortably in all their different stages, that will also play well in different settings. For instance, the bucket you see in these pictures was used for a tiny newborn, a one year old, and some other ages in between. It also worked well for multiple looks and locations. With babies, first and foremost, always remember to keep safety in mind when choosing your props. For this bucket, I used blankets to provide comfort and support which also added a little more visual interest.


 When finding a good prop, a couple of things to keep in mind are...know what you are looking for and give yourself time. As my fall season was approaching this past year I knew I wanted something I could use for babies that had some fall flare to it. I wanted to be able to somewhat contain them considering the ground is not always great that time of year. I also knew I would have a variety of ages that it would need to be good for. I started looking in August and came across this great little apple tub at the Christmas Tree Shop. I had seen other things similar to it at some craft stores, but they were all coming in at around $50.00. To my surprise when I checked the price on this one it was only $12.99! You can imagine I was ecstatic! It was exactly what I was looking for and the grand total was less than half of my budget!


Those funky oversized ornaments that you see were also
from the Christmas Tree Shop. They were an inexpensive way to
add some Christmas flare. 

Not all of my prop endeavors have been as successful as this one was. It takes a good amount of patience, and experimenting but eventually you will find your nook and the process of finding something great gets a lot easier. Some places that have had great finds for me are EBay, the Christmas Tree Shop, Hobby Lobby, and other craft stores. A lot of times the craft stores will have their 50% off sales which will usually lend a good opportunity. Also keep an eye out for their coupons for additional savings. I do also recommend doing some browsing through Esty. They have some incredibly unique things that can be very reasonable! Lastly, if there is some hard-to-find item that you just can’t seem to get your fingers on, make a Facebook post about it. I just inherited an old vintage chair that worked out amazingly for kids' Christmas pictures and it cost me absolutely nothing! A very nice person had it sitting in storage and they didn’t want it anymore!

So whether your just a hobbyist that enjoys photographing babies and kids or more of a pro, a little patience and perseverance can go a long way to help to find the perfect prop! Happy prop hunting everyone!


Thank You Crafty Life and Style for having me as your guest blogger today! :)


The floor/background you see in this was is a piece of fadeless paper that I ordered from Mardel. It cost $7.99 and has worked great so far!

Thank you Mary.  See more of Mary's lovely work on her website:  http://www.marynicholsphotography.com/

Saturday, January 15, 2011

Meet Mary

I became a fan of the photography of Mary Nichols after she took some pictures for a friend who was grieving the terminal illness of a close family member.  It was a sensitive situation and Mary took extra time, used extra patience, and captured extra special memories.  Because her approach was less about business and more about showing some humanity...I thought she would be the perfect fit for our little blog family, which is full of a bunch of ladies from different backgrounds, sharing pieces of themselves.  We hope you enjoy her posts once a month on our Shutterbug Sundays.  Here is Mary, in her own words:

About Me: I was your typical stay at home Mom with a little hobby called photography. After having my son I very quickly became obsessed with learning how to improve my skills. I wanted to be able to take better photos of him which is what spiraled me into starting my own business. I love all things photography especially black and white photographs. To describe myself in a nut shell? I am madly in love with my husband and son, addicted to latte’s, a writer, art lover, dog lover, procrastinator, ditsy at times, inspired by vintage, wearer of pearls, hobbyist of interior design, and I love and I crave simplicity in life.


Welcome Mary!  You can find more of Mary's beautiful work on her website:  www.marynicholsphotography.com

Sunday, December 26, 2010

Canon Christmas

It was one year ago this weekend that my life changed.  I was given a 15mp Canon Rebel.  I was giddy with excitement from day one...running around the house, the yard, and the neighborhood shooting closeups of anything...closer than any traditional camera had every allowed me to get.  A new world opened up to me.  On what is our traditional Shutterbug Sunday...I'm sharing with you some of the first pictures I shot....like my dog...with a shutter so speedy I captured her mid-lick...
Or the outdoor lights I shot without my camera going into a focusing coma....
Or the series of shots I took of my niece's new kitty exploring a Christmas tree for the first time....taking pictures has never been so fun as the first time I used my brand new REAL camera.  Happy Holidays.

Sunday, December 5, 2010

Shutterbug Sunday: Giveaway Winner

We're seeing stars with this fun photo uploaded by our latest giveaway winner, Bridget of aviary [images], who worked for her reward.  We generally make it pretty darn easy to win here on Crafty Life and Style, but our friendly shutterbug, Tammy Lee Bradley, issued a challenge last month, asking readers to test out Bokeh shapes.  Tammy explained how you can make the background of your pictures pop with shapes by adapting your lens.  In fact, she gave us two blogs about bokeh.  Check out the posts to find out how you can achieve this beautiful and fun effect here and here.

Our congratulations to Bridget (a fellow blogger) and thank you to Tammy Lee, who offered up these beautiful custom greeting cards as a prize.  You can find more of Tammy's photos and other items for sale here:  http://www.tammyleebradley.bigcartel.com/

Sunday, November 21, 2010

Shutterbug Sunday: I Heart Bokeh & GIVEAWAY

Vintage Heart Bokeh
As I discussed in my last Shutterbug Sunday post, I love bokeh...gorgeous blurry, round, magical bokeh. This week, I wanted to show your something different, my attempts at heart-shaped bokeh.

First, I scoured the house looking for black construction paper and finally came up with a piece of brown paper. Close enough, I was in business! Using the small end of the lens hood from my 35mm 1.8, I traced a circle on the paper and cut a heart in the exact center with my husband's pocket knife. With all fingers still intact, I trimmed the circle a bit with a pair of scissors and taped it to the inside of the hood with some blue painter's tape.

With my family laughing at me for making my D90 look like a school craft project, I headed out in search of bokeh producing light. I shot the sunshine streaming through my bouganvillea arbor. I skulked around the neighborhood after dark capturing headlights, street lights, and signal lights. I punched holes in a piece of cardboard and captured the perfect heart-shaped dots that appeared when I placed it in front of a window. I even dug in the attic for our white Christmas lights and added them to our garden hedges to make more defined hearts that you see in photo above. Our neighborhood lawn crew must think that I have lost my mind.
A few tips:

Use a lens with the largest aperature possible (f1.4, 1.8, 2.0) and make sure the heart is exactly in the center of the circle.  Due to the large amount of the lens covered, I found that I had to adjust the shutter speed to a slightly slower speed to allow in additional light and I set my ISO to 100 to prevent grain.

Get out and try it, experiment with other shapes, and link-up your own photos to the Linky tool that I have provided.  As an added incentive, I am giving away a set of 5 greeting cards from my print collection to one person that links up by November 27th at Midnight.

I invite you to visit my blog, bliss and folly, to see more examples.
Until next time. Stay sweet. ♥ tammy lee

Sunday, October 24, 2010

Shutterbug Sunday: Shadow Play

Shadow Shot
Shadow Shot by Tammy Lee Bradley

Looking for a fun photo exercise to go with the kids? Consider shooting some shadow self-portraits. They are quite easy to do. With a bit of creativity and a nice sunny day, you can end up with compelling shots.  Today, I recruited a few of my fellow muses from Mortal Muses to help demonstate.
loving shadow jumping
shadow jumping by michel feist
For the longest and most interesting shadows, try to take advantage of the low-slung sun, right after sunrise or just before the sun sets. As shown in Lucy's photograph below, you will also be rewarded with warm light and tones.
long good night
long good night by lucy.loomis
Feeling silly? Use yourself or models to create "shadow puppet" images. This technique is also good for a rainy day? With the appropriate lighting, you can also get some nice shots indoors.  
shadow puppet
shadow puppet by à la mosey
Do you have some shadow shots that you would like to share with us? I have added a mcLinky for your submissions. 
Until next week. Stay Sweet and Keep Shooting!
Tammy Lee Bradley of Bliss and Folly and Mortal Muses


Powered by Linky Tools
Click here to enter your link and view this Linky Tools list...