Sunday, October 31, 2010

Giveaway!!!

 Teddy is a great model, but let's face it, this would look better on you or someone you love! I was feeling crafty today and thinking about just how awesome all you readers are out there, so I decided to make you a gift! Leave a sweet comment on this post and you are entered to win this cute as can be headband! Yep, it's human sized! LOL If you are a follower you can leave a second comment on this post letting us know you are a follower and you get a second entry to win!

Teddy will randomly select a winner and we will announce who it is on Saturday November 6th! Good luck and have a safe Halloween!


Saturday, October 30, 2010

Bring the Outdoors In

You normally think of shingles as an exterior for a house.  But, they can add an interesting texture inside your home too.  These cedar shingles appear throughout a renovated home I visited recently.  They don't line the walls of large rooms.  That could be overwhelming.  Rather, they are accents that appear in nooks and small extensions of rooms.  This homeowner loves to sit in this nook for phone conversations.  It is a small piece of the outdoors that she could bring inside...and it looks great.  There are also hints of shingles in smaller areas throughout the house, tying the theme together.  Walls can be more than paint or wallpaper.  Break out of the box.  With cedar shingles, this room is interesting, layered, and reflects the au naturale style of the owner 100%.

Friday, October 29, 2010

Frame Fix

My 8 year old son says "A mistake is a good thing!" when it comes to art. I love him so much for telling me that. It's true- you don't need to be "perfect" in your art- in fact allowing yourself to be more organic and a little flawed frees you from the search for the impossible.

I acquired several antique picture frames at a garage sale this summer and this one was "flawed" and almost headed to the dump. Instead I pulled out the tacky glue and decided to glue it back together. With a crack like this one it's very hard to exactly match up the fracture lines, but I kept my son's advice in mind. This mistake was a good thing! I did my best to help the glue fuse together and allowed the final product to show its little imperfection.

There are paints you can match up and you can disguise the crack even further- but for me I love it just the way it is. Remember- "A mistake is a good thing!"

Thursday, October 28, 2010

Thank You

We'd like to thank Elizabeth from "Exposures From the Heart" for mentioning our Shutterbug Sunday. Check her out- you can see her love of photography in her lovely pictures .

How To Make A Bow


SUPPLIES:
·         ribbon with wire edges
·         floral/fine weight wire
Hold your ribbon between thumb and index finger 6" from end of the ribbon. Keep right side of ribbon facing up and loop open side. Then twist the ribbon until right side is facing up. Twist same size loop on the other side and pinch together between thumb and index finger.
Repeat steps each time making loops smaller in size. Insert wire through the center of smallest loop. Fold wire in half over area or ribbon you are pinching. Then twist tightly - fluff out ribbon and be sure right side is facing out. Hook wire into smallest loop and pulled down. Fold in half and twist while holding with thumb and index finger then twist tightly, fluff and a beautiful bow you have made. You can also use the bow on gifts by using the same method of bow wrapping.

Hope you enjoy making them! All the best- Crafty Lady!

Wednesday, October 27, 2010

Scrapbooking Invitations


You can make someone's birthday truly special by making their invitations. For this one I thought it would be fun to find a baby picture and make it the focal point of my creation. I suggest making one sample. You can play with colors and the location of your picture and text. Once you've decided the best placement then you can start mass production.

For this creation I thought a bold black, white and grey combination with a surprise of blue would be a fun way to play up a milestone birthday. I actually used a paper packet and vowed to not go out and buy any supplies! So, I had to work within my stash.


Believe me, I wasn't hurting, but I will say I had a few moments of wanting all the invitations to look exactly alike.

Mass production of individual elements makes you move faster. So, cut all your large cards, small border cards and photos and printed text all at one time. Then go on to inking the edges.

I used a stamp glue and loose glitter for my "It's a party" element. It was the first time I used it. I thought it was a tad messy- but I'm not one to be "perfect" in any of my crafting and I thought it said "Handmade" and I liked it. Adhere all the photos to the borders and then to the cards. The final element was the little gemstone.

I loved how it came out! What do you think?

Tuesday, October 26, 2010

Tasty Tuesday: Pasties Pie

This Tasty Tuesday is brought to you by a travel loving Crafty Cat.  Destination:  Michigan.  Dinner:  Pasties.

Whenever I visit a new place, I love to soak up local color with local treats.  I had never heard of pasties until I visited Michigan.  Before your mind runs amok...it is a food....pasties, the meal.  I'm not talking about any other kind of pasties.  The writer in me feels compelled to tell you that it is pronounced past-ee...NOT paste-ee.  They are a meat, onion, and potato filled pastry.  There are numerous restaurants in Michigan that serve them.  The examples you see here are actually made in a small take-out shop called "Jean Kay's Pasties". 

They actually are tasty, but simple.  A sophisticated palette may long for something more spicey.  But, they are perfect for the meat and potato type of person and kids.  I'm told some people add ketchup, others add gravy.  I had mine plain in order to really experience the taste.  The meat in my take-out meal is tiny steak strips, the potatoes are diced very small, and the onions are hardly visible, but infused into the pastry pocket.  Hungry?  Come to Michigan...you'll find plenty of them.  Until you make it there, a local offered me his own recipe to share.  He grew up eating pasties in a community with lots of Norwegian settlers.  Keep in mind, his version won't produce exactly what the restaurant version did, but it is still tasty and you can adapt it to your own taste.  My father made it with sausage and loved it.
Pasties Pie Recipe:
1 pound of hamburger, or sausage, or a half pound of both
3 large potatoes
1 medium onion
salt to taste
pepper to taste
1 box of Pillsbury Pie Crusts
Several slices of REAL butter

Cube the potatoes very small, about the size of your pinky nail (that's my measurement). Dice up your onion. Mix the meat, pototoes and onions all together in a bowl with the salt and pepper adjusted to your level of taste.

Line the bottom of a glass pie plate with dough to make a bottom crust. Pour the meat, potato, and onion mix into the pie plate. Put pads of real butter on top of the mixture...and be generous with that butter, so it isn't too dry. Cover with pie dough.

Make a few slits on the top of the crust. Bake in the oven at 350 degrees for about an hour. If your potatoes are diced larger, it will take longer to cook. Check to see if potatoes are done and serve.

*Note: This will look more like a pie.  But, if you would like to make individual servings, as seen in the pictures here, simply wrap the meat mixture in the pie dough, rather than lining a bowl, and bake the pastry pockets. Make sure you add slivers of butter to each pocket before you wrap them to add moisture and flavor...and only use REAL butter.  Bon Appetite!

Monday, October 25, 2010

Clothing Decor

Whether it is from your own closet, an heirloom, or just a fantastic vintage find...clothing like this old wedding gown can really become the centerpiece of a room.  Consider draping it over a bed OR put your babies baptism gown in a shadowbox and hang it on the wall.  Better yet, get a dress form, so you can protect the shape and display it in a corner. That's what I did with a dress I bought from a renaissance festival years ago.  I thought it'd be a fun halloween costume.  It is so lovely, I hated to put it away for 11 months of the year.  A young girl would go gaga over having a beautiful dress, veil, and gloves on display next to her tea set and dolls.
If you're someone who loves vintage accessories, you may have accumulated lots of hats, purses, and gloves that are now at the bottom of your closet.  Why not use them as an accent for your room?  You bought them because you love the vintage look and they reflect your classic style.  They'll likely add the same flair to your wall.  Nothing is better than having your home reflect exactly who you are.  Clothes and accessories can double as decorations.  Get them out of the closet!!

Sunday, October 24, 2010

Shutterbug Sunday: Shadow Play

Shadow Shot
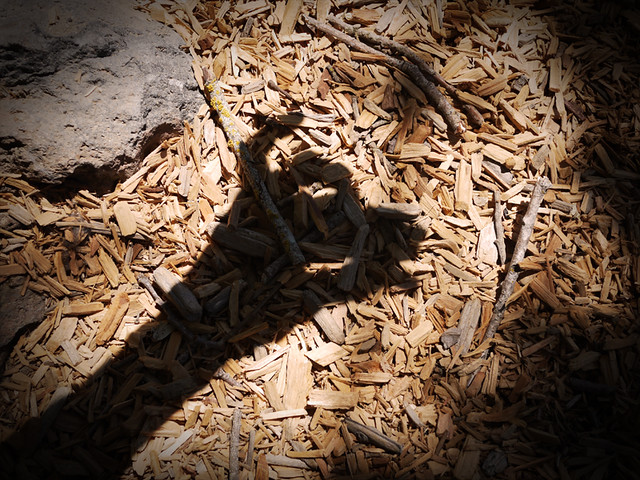
Shadow Shot by Tammy Lee Bradley

Looking for a fun photo exercise to go with the kids? Consider shooting some shadow self-portraits. They are quite easy to do. With a bit of creativity and a nice sunny day, you can end up with compelling shots.  Today, I recruited a few of my fellow muses from Mortal Muses to help demonstate.
loving shadow jumping
shadow jumping by michel feist
For the longest and most interesting shadows, try to take advantage of the low-slung sun, right after sunrise or just before the sun sets. As shown in Lucy's photograph below, you will also be rewarded with warm light and tones.
long good night
long good night by lucy.loomis
Feeling silly? Use yourself or models to create "shadow puppet" images. This technique is also good for a rainy day? With the appropriate lighting, you can also get some nice shots indoors.  
shadow puppet
shadow puppet by à la mosey
Do you have some shadow shots that you would like to share with us? I have added a mcLinky for your submissions. 
Until next week. Stay Sweet and Keep Shooting!
Tammy Lee Bradley of Bliss and Folly and Mortal Muses


Powered by Linky Tools
Click here to enter your link and view this Linky Tools list...

Saturday, October 23, 2010

Dollar Store Costumes


A Gift For You!
Cost $3

I bought three items: a beautiful purple gift bag, purple ribbon and a package of multi colored tissue.

Cut the hole out of the bottom of the bag. Staple ribbon from the front side of the bag to the back side of the bag over each shoulder. Staple tissue paper to the front of the bag. Use some of the purple ribbon to make a bow for her hair and then staple some tissue paper to the ribbon!


Puppy Love!
Cost $4

I bought 4 items: 4 hand micro fiber dusters!

All the rest of the items were found on a scavenger hunt around my house. I attached the two skinny dusters to a headband, dressed our model in a brown turtle neck and handmade scarf from my talented aunt. The finishing touch was a little makeup to provide the nose and the whiskers!


 Pop Corn Anyone?

Cost $5

I bought 4 items: an apron, a bag of 10 individual popcorn bags (but only used 4), two packages of white jar openers and a pair of sunglasses!

Cutting up the bags and placing them on an angle really made this costume reflect the fun that comes along with eating popcorn. Once again I just stapled away, securing the bag to the apron. Then I cut the jar openers in half and stapled those on as well, bunching them up at random to make each look unique! I used the extra parts of the bag to make the head band around her head. This was the only part of the creation where I had to use tape to secure it. I cut out the "fresh" in one of the bags and i taped them on to her glasses!


These unique costumes were so fun to make!

Note: these are handmade ideas that have not gone through the standard of safety testing that store bought costumes have- so be safe.

Snake For Dinner

In the spirit of Halloween week I cooked up a special treat for the kids!! SNAKE!!
Ingredients:
Toothpicks
2 whole cloves
3 egg yolks
Liquid food coloring
12 ounce Monterey Jack, grated
10 ounce bologna 10 ounce thinly sliced salami
10 ounce thinly sliced ham 4 tablespoon spicy mustard
Flour, for dusting
1 can crescent rolls
2 small pimiento-stuffed olives
1 (1-inch) strips jarred roasted red peppers
Directions
Preheat the oven to 375 degrees F.
Line a cookie sheet with foil. Grease the foil and set aside.

 
Dust a flat surface lightly with flour. Spread out the crescent dough - do not separate. Pinch together the seams so that you have 1 piece of dough. Roll out to make a large rectangle. Make sure the dough is not stuck to the surface at all.

Brush the dough with the mustard, leaving a 1-inch border. Layer the meats down the center of the rectangle, leaving a 1-inch border on either end. You can feel free to use your favorite cold cuts.
Top the meats with the cheese. Fold 1 side of the dough over the filling, lengthwise. Then, fold the other 1/2 over and press the seal the filling inside. Take 1 egg yolk, and beat lightly with a fork. Brush the egg yolk over the top of the dough. The yolk will act as the glue to hold. Fold the dough in 1/2 again lengthwise. Pinch the seam with your fingers to seal. Press the outside of the dough to make sure everything is sealed tight and to make an even thickness for the body of your snake. Taper 1 end of the dough to form a tail shape. Form the other end into a head shape.Beat the 2 remaining egg yolks together. Transfer to 3 separate small bowls. Add some food coloring to each bowl - whatever colors you like! Using a clean paintbrush, paint the snake with the egg yolk/food coloring mixture.

 
Transfer the snake to the foil lined sheet tray. Form into an s shape so it looks like the snake is slithering. Insert 2 cloves into the head to look like nostrils and 2 stuffed olives for eyes. Create a mouth or tongue with the roasted red peppers. Bake the snake for 25 minutes, or until golden brown and cooked through.

NOTE: this was a recipe I found last year online- but I can not find the website to say thank you for the recipe--- so a note to the original chef who came up with the idea thank you!

Friday, October 22, 2010

Shelf Pumpkins

Sure you can buy lots of pre-fab witches, wolves, monsters, and ghosts.  But, Crafty Life and Style hopes you are filling up the house with handmade Halloween decorations this year.  If you like to leave subtle little reminders of the season around the house...here is one idea, shelf pumpkins. 

Here's what you need:
1-12x12 piece of orange fabric.
2-5x6 pieces of green fabric (or infant socks)
1-black marker
1-scoop of bird seed
1-package of cotton balls or other stuffing
3-tan rubber bands
Several strips of tan and green raffia
Glue gun
Scissors
Sewing machine and associated products optional

First lay out your 12x12 orange fabric.  Place the scoop of bird seed in the center and spread into a small circle for the base of your pumpkin.  This will help weigh down your pumpkin and hold it in place on your shelf.  Fill the center with cotton and begin to lift the corners of your orange fabric, bunching up the sides to form a round ball.  Keep pushing down your cutton as you pull the fabric tighter and stuff as much filling in as you need until the pumpkin is the desired size.  You will have extra fabric on top.  Just wrap a rubber band tight around the top to hold your pumpkin together.  Then, cut the excess fabric, leaving a small "stem" at the the top of your pumpkin.  Now, wrap the raffia around the stem, tie it in place, and reinforce with glue.  Now you are ready for the legs.
There are a couple of options for the legs, depending on whether or not you have a sewing machine.  If you want to try to sew it...here's what you can do:  Lay a 5x6 piece of green fabric.  Fold it the long way, with the inside facing out.  In order to create a point on the toes, you need to draw a sew line similar to what I show below.
Once you are done, flip the fabric so the inside is back on the inside.  Put some cotton in the botton of the foot.  Then, tie it off with a rubber band about 1 1/2 inches from the bottom.  Tie raffia around the rubber band, use glue to secure it and make a ribbon with the raffia.  Repeat the process for the second leg.  Once the legs are ready, fold the legs above the feet until their flat.  Flip the pumpkin over and sew the flat end of legs to the rump of your orange ball.  Put the pumpkin right side up and draw your face on as the final step, so everything is even.  If you don't have a sewing machine and want to avoid sewing the legs...you can try to ad-lib with a pair of cute infant socks or stockings.  In the end, you have a cute little pumpkin to sit on a shelf at work, home, or in your car.  Thanks to Crafty Grandma for this one.

Thursday, October 21, 2010

Halloween Party For The Kids


Halloween is so magical for the kids, so why not throw them a fun party? You can have them make their own construction paper placemats. Give them the stickers and markers and help them personalize their placemat. Give them some coloring books and plan a fun snack for them.

I had fun making a centerpiece for this party! It really impressed my little guests and it was rather simple to construct!

Supplies:

-1 small piece of felt
-gauze
-1 foam cone
-1 foam ball
-4 white pipe cleaners
-2 wiggly eyes
-1 tooth pick
-tacky glue

-mod podge or fabric stiffener
-1 piece of cardboard cut into a circle. That will be your base and you cover it with paper towels.
-black shiny ribbon
-spiders and web to decorate with
-one milk carton bottom
Adhere the round cardboard cut out on top of the milk carton base. Then adhere cone to the cardboard circle. Insert 1/2 of the toothpick into the tip of the cone, put a little glue around the top area and then push the ball down on top of the toothpick. Allow that to dry. Twist the pipe cleaners together and then wrap around the top of the cone.
In a separate bowl dunk your gauze into enough Mod Podge to make it wet. Fold the gauze in 1/2 and then drape over your foam creation. Allow it to dry and then decorate with your web and spiders!! Too cute! Have fun~ Crafty Lady.